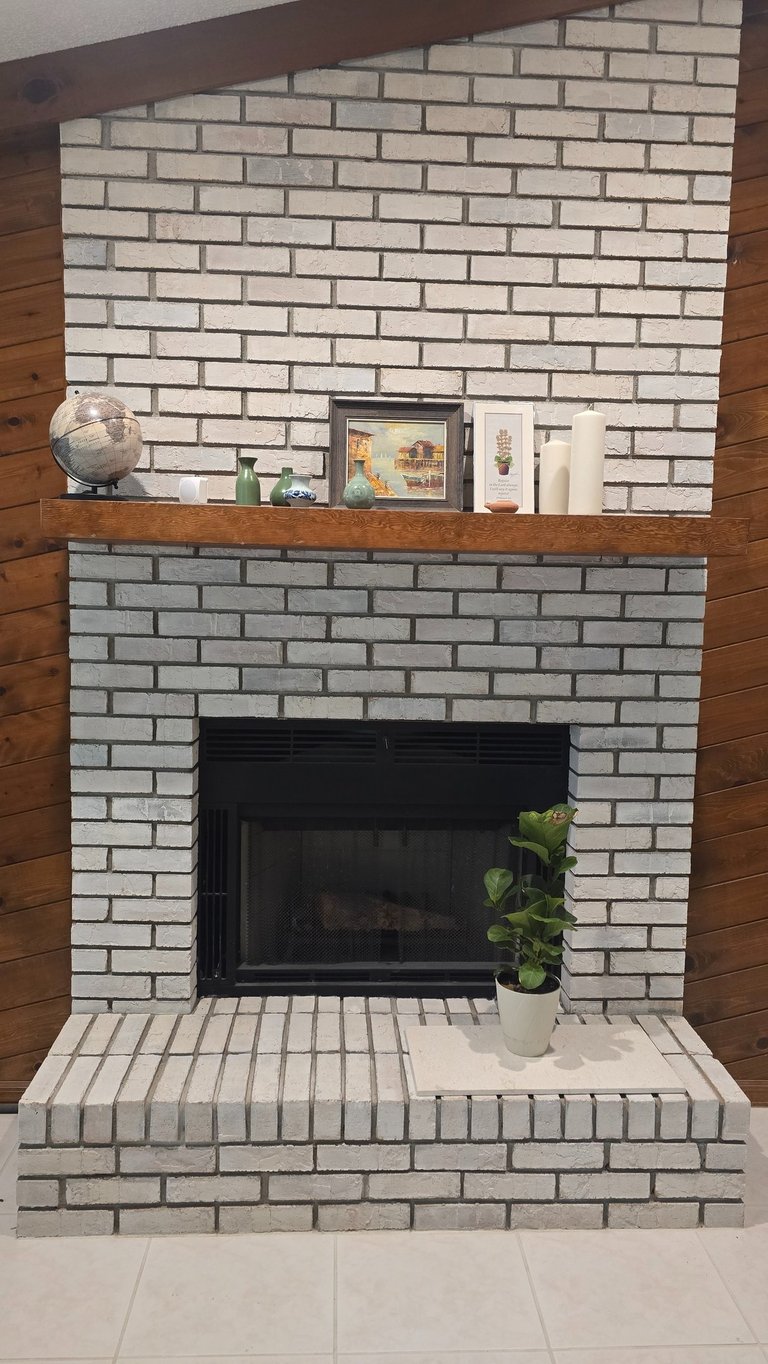
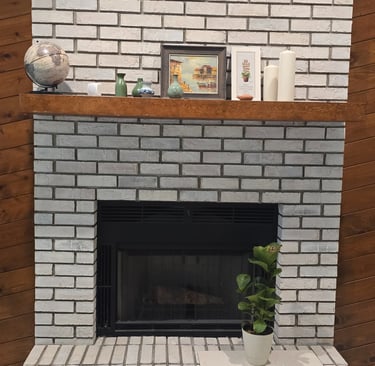
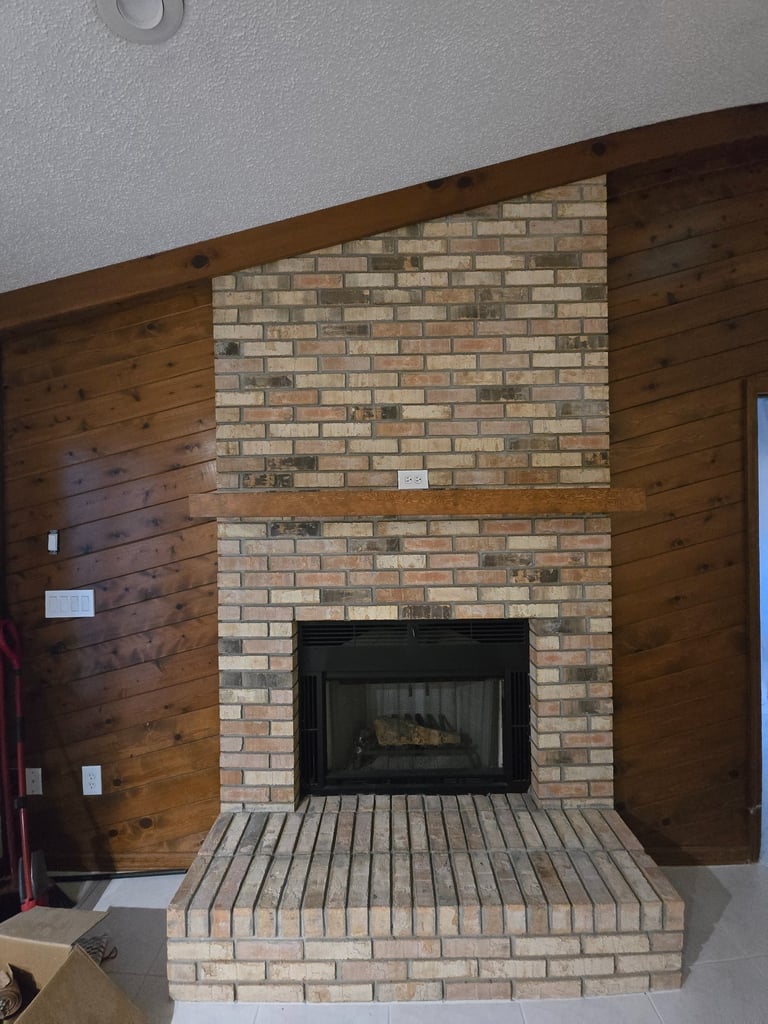
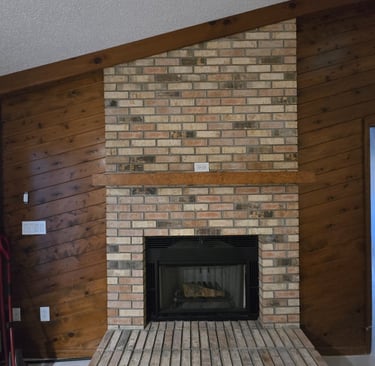
DIY your chimney with limewash
Here’s a clear, weekend-friendly guide to limewash a brick chimney.
What you’ll need
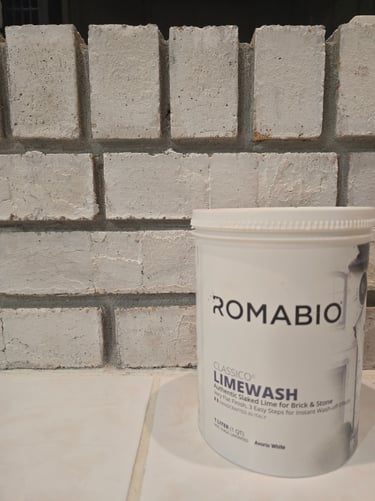
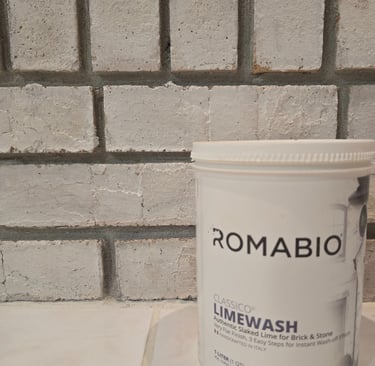
Limewash (store-bought mineral limewash) or Type-S hydrated lime + water. I used Romabio limewash. https://amzn.to/4fMiZcM
Bucket, stir stick
brush, smaller brush for edges. I used a regular paint brush
Spray bottle or garden sprayer (clean water)
Drop cloths, painter’s tape, plastic sheeting to cover the areas you don't want paint on
bottle of spray water.
Before you start
Porosity test: Splash water on the brick. If it soaks in within a minute, you’re good. If it beads, the brick is sealed/painted—remove sealer/paint first. My chimney was never painted so I was good to go.
Interior vs exterior: Avoid the inside of the firebox unless you’re using a high-heat product. Limewash is great on the surround and exterior chimney.
Protect & prep
Dust the chimney, then prep the area by taping the edges, floor and any shelves you have on the chimney.Pre-wet the brick
Just before coating, mist the brick evenly. Limewash bonds best to damp (not dripping) masonry. For this I used a bottle of water to spray it over the section I was limewash. Do this by section.Mix your limewash and test
Premixed: Thin with water to a milk-like consistency if needed.
DIY: Start around 1 part hydrated lime : 1–2 parts water by volume. Stir well and let it sit 15–20 minutes (“slake”). Adjust with water for a brushable, slightly translucent mix. Note: I suggest to test a small section. On the end I opted for a more diluted ratio. Also, if you think it is to thick or to deep of a color, you can also spray water and wash away any excess.
First coat (thin)
With the brush, apply start your painting process, no need to particular ways, I did avoid a painting the grout (or the in betweens of the brickes). Work in small sections (2–3 sq ft), keeping a wet edge. Don’t chase perfection—texture is part of the look.Feather transitions
If you thick the color was too deep, spray some water and wash off the excess.Optional: Distress for brick peek-through
Within 10–30 minutes (while still damp), dab with a damp sponge/cloth to reveal some brick faces or edges.Dry & assess
Let the first coat dry 45–90 minutes (longer if humid). It will lighten. Decide if you want a wash (one coat) or a more opaque look.Second coat (as needed)
Lightly mist the surface again and apply another thin coat. Repeat distressing if you want variation. Two thin coats usually give a soft, cloudy finish.Clean up
Rinse brushes and buckets with water. Carefully pull tape while the last coat is slightly soft for cleaner lines.Cure & use
Avoid scrubbing or heavy contact for a couple of days. For fireplaces, allow full cure before burning a fire nearby.
Tips & troubleshooting
Blotchy spots: You may have dry patches—mist lightly and brush a thin pass to even out.
Too opaque: While fresh, mist and wipe back; once cured, apply a thinner wash over select bricks to add variation.
Chalky rub-off: Normal at first. After full cure, light dusting stops. (Avoid sealers; they can trap moisture—limewash is meant to breathe.)
Inspiration
Explore DIY projects and home decor ideas.
Projects
Ideas
© 2025. All rights reserved.